Cap-It-All Building Inspections

DIY Home Inspections – How to Spot a Lemon

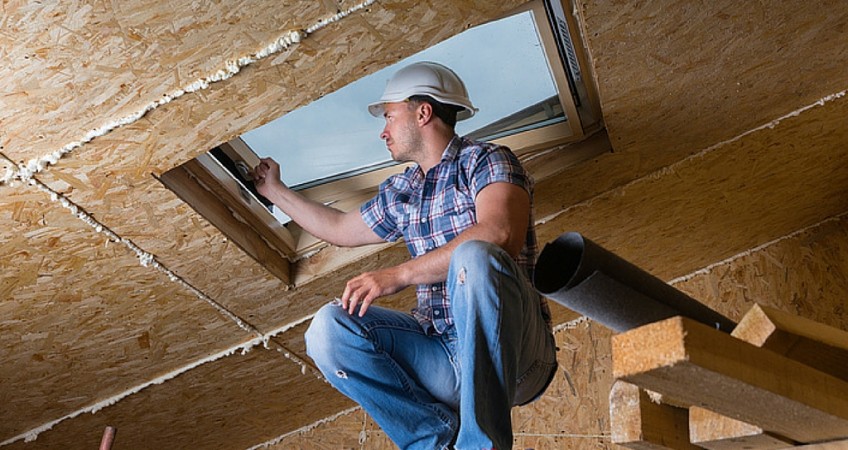
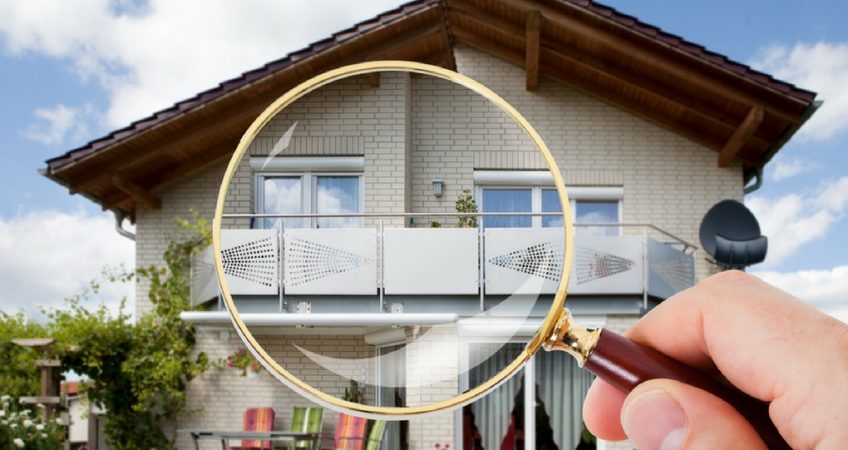
At Cap-It-All, we specialise in helping people avoid bad investments, and to understand what they are getting into, as well as inspecting for safe construction. If you learn a few simple things to look for when considering a property to buy, you’ll be able to recognise which issues you may want further investigated by a professional.

Focus on the Big Things First

While an ugly kitchen may be a deal breaker, it doesn’t necessarily make a house a lemon, but there are plenty of things that do. Here’s where you should start.

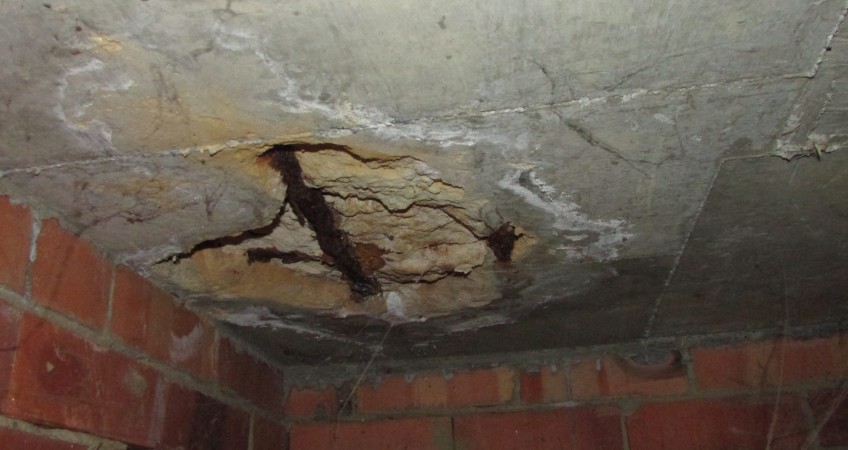
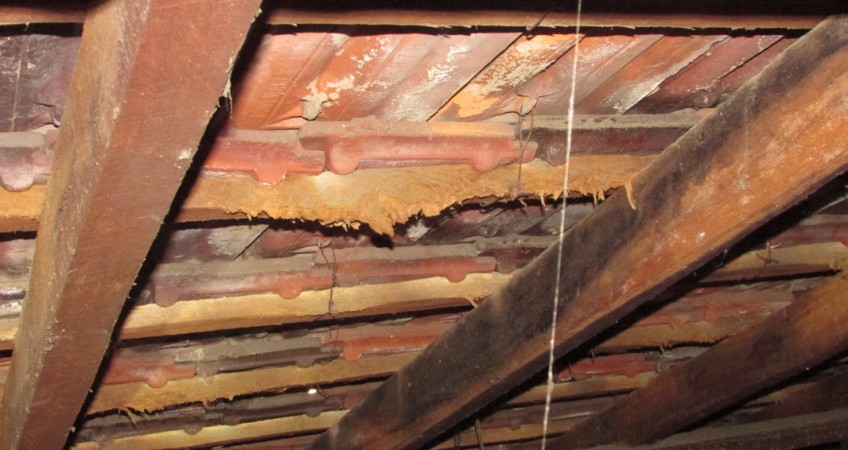
Roof damage can be a major expense, and may also lead to internal water damage that isn’t seen. If the roof looks bad, pay attention to roof spaces and ceilings for signs of damage.

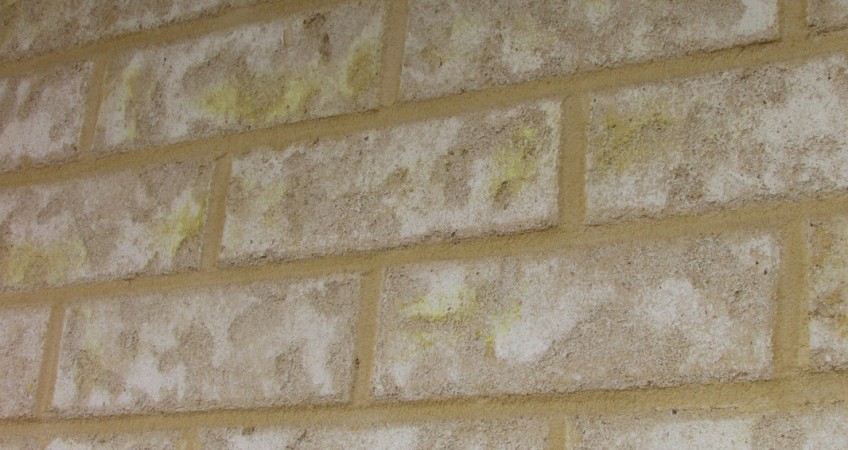
Foundations can often be repaired, but severe settling, or rising can mean the entire house is in jeopardy. Look for unevenness in floors and paved areas, as well as visually tilted walls and ceilings.

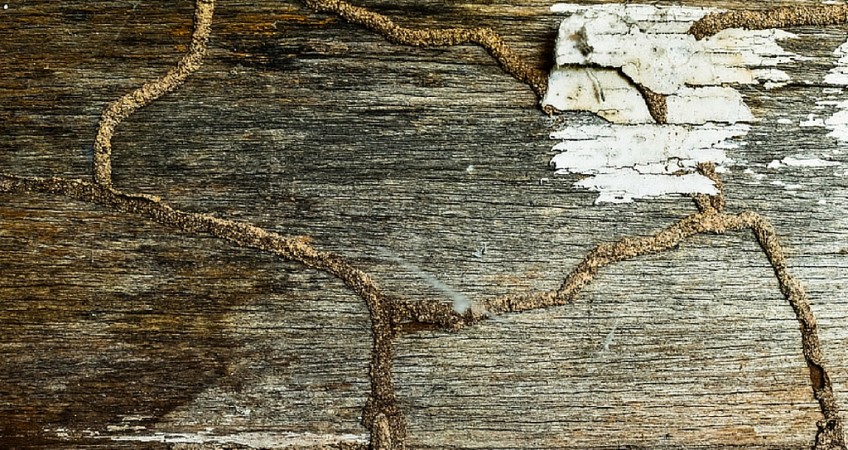
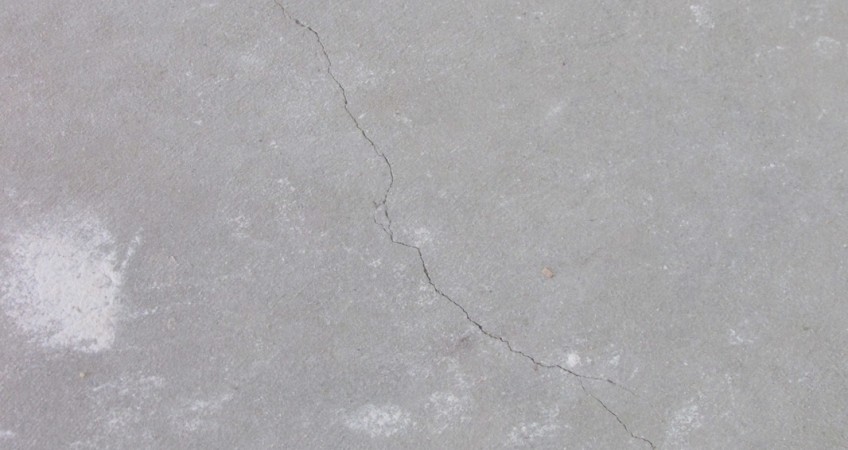
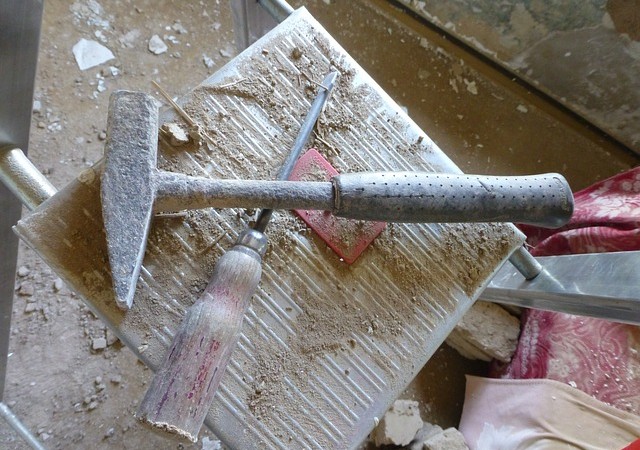
Cracking is common in most homes, however some forms of cracking is obviously worse than others. Look for cracks that may be 5.0mm or more in width.

Doors and windows are simple to replace, but if a property has several doors or windows that don’t open or close properly this may be a sign of structural damage.

Make sure the Property “Works”

The next biggest expense is whole systems that affect the entire property. If there are major issues with gas, plumbing or electrical appliances, think twice and have us do an especially thorough check if you suspect issues.

Turn on lights. If they don’t work, ask for an explanation and make a note. It may be as simple as a bulb needing changing, but if the whole fitting is not working you should reasonably expect the seller to rectify this prior to settlement.

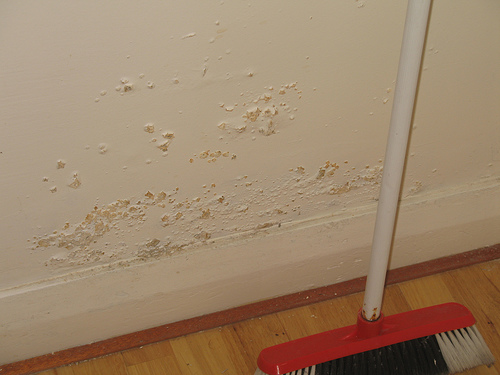
Flush toilets and test taps, and expect them all to work. Look for water damage to paint on walls or in cupboards beneath sinks. All taps should turn on and off with trouble. Noisy pipes can indicate problems, as can slow drains.

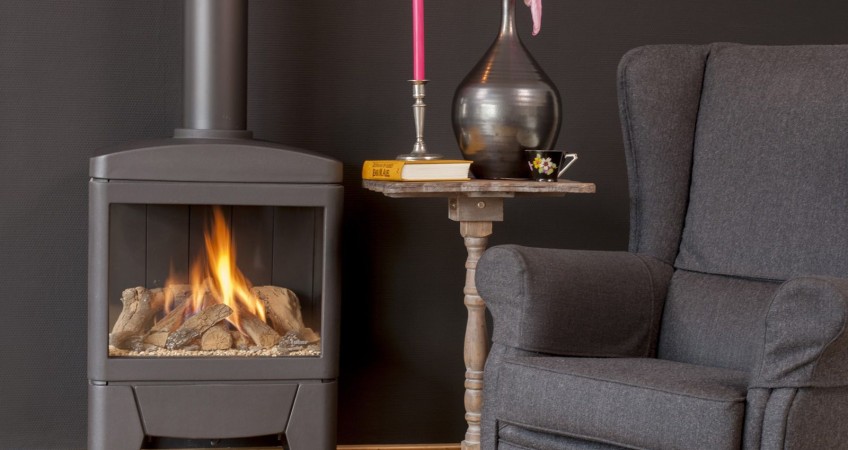
Test HVAC equipment and all heaters, exhaust fans and cooling systems. Replacing one of these can make a good deal into a lemon in a hurry.

Once you’ve found a property you think is a good buy, call us, we’ll be happy to inspect. We’ll let you know what we find and give a professional opinion on the property’s condition.

RIsing Damp Perth

Rising Damp in Perth

What is Rising Damp?

Rising damp occurs when moisture is drawn up through a masonry wall in a capillary action. For rising damp to occur the section of the wall must be greater than that of the ground. The majority of buildings are constructed incorporating a physical damp proof course at a level of around 150m above ground-level externally and at ground level internally to prevent ground water from rising up the walls of a building.
If this damp proof course is damaged, bridged or deteriorates then rising damp may occur, affecting the health of the occupants and depositing soluble ground-water salts that grow as crystals and cause damage to the internal plaster.
The normal limit for rising damp ranks from 0.5 – 1.5 metres above ground level, dependent upon the
permeability of the affected structure.

A Brief History

The issue of rising damp has been a concern. Since ancient times the Roman architect “Vitruvius” referred to the problem of dampness rising up walls and advised on how to construct buildings to avoid this. Eventually the
Public Health Act of 1875 in Victorian Britain introduced the requirement for a damp proof course in walls to
prevent rising damp.

Health Implications

Rising damp in buildings leads to the growth of microbes such as mould, fungi and bacteria, which subsequently emit spores, cells, fragments and volatile organic compounds into the indoor air. Exposure to these
contaminants is clinically associated with respiratory symptoms, allergies, asthma and immunisation reactions.

Diagnosis

Diagnosis can often be made by the forming of a visual band of soluble “tide mark” at the peak of the damp’s rise. If this is not present, then the use of a moisture meter will normally suffice with moisture content within the wall becoming gradually higher as you gravitate towards ground level. Caution should be exercised to eliminate penetrating damp issues such as a blockage within a cavity wall.

Rectification

In order to cure a rising damp problem, a new form of damp proof coursing must be installed. This may be achieved by utilising one of the following methods:
•    Installing a new physical damp proof course.
•    Injection of a liquid or cream chemical damp proof course (DPC injection).
•    Damp proofing rods.
•    Porous tubes/other evaporative methods (e.g schrijver system).
•    Land drainage.
•    Electrical-osmotic systems.

Once the chosen method of rectification has been implemented, the existing salt-affected plaster will require
removal, usually to a height of approximately 350mm above excessive moisture readings which is normally
approximately 1 metre above internal ground level.
Re-plastering and re-decorating times are the subject of much debated, however I believe that it is advisable to trust your main contractor’s judgement, provided that the terms of the warranty also align with this.
As it is not possible to skim over the white-set finish plaster used in Perth, a little creativity should be used to
ensure a perfect and yet cost-effective finish. If the plasterer and painter are able to ensure you of a perfect, seamless finish between new and existing then this would be the best scenario, otherwise alternatives to
consider include:
•    Removal of the white-set plaster above level of re-plastering to facilitate white setting of the full walls.
•    Dry lining/plasterboard application to walls.
•    The use of dado rails to provide separation of old and new plasterwork.
•    Wallpapering.
•    Total re-plastering of all affected walls.

Each of these methods have plus and minus points and carry different levels of expenditure. Be sure to
undertake your due diligence before you commit.

If you have concerns that the property you’re purchasing may be affected by rising damp, contact
Cap-It-All Building Inspections today, so we can undertake an inspection of the property and offer you
best advice.

Common Hidden Faults and How they can Cost You

When you view a house for the first time, what do you look for? You might be sizing it up to make sure it is spacious enough to accommodate your needs. You may take note of general tidiness. Those with a keen eye may check for marks and scuffs on the walls and floors. But even if things look great on the surface, it’s the hidden damage and faults that can really cost you in the long run.

With many years conducting Perth home building inspections, Cap-it-all has seen it all. We know looks can be deceiving and your dream home may actually be a nightmare in disguise. Here are some of the common hidden issues in homes that can be picked up with a comprehensive building pre-inspection.

Damaged Roofing

Regardless of how long you spend examining the interior of a home before buying, you’re unlikely to ever get out the ladder and check up on the state of the roof! And yet, the roof is a common place for defects to be found. Exposed to the elements, a roof will slowly deteriorate over time and, if the degradation is left unnoticed, it can eventually become severe enough to cause leaks. If a roof is sagging, it’s usually a sign of poor construction and major structural faults, which could eventually lead to the roof giving in.

If a roof is old and degraded or lacks sufficient structural support, it can be very unsafe for the residents. To repair sagging or degrading roofs, you need a specialist roofing contractor. Roof repairs can range anywhere from hundreds to thousands of dollars.

Mould

Mould not only looks nasty and spoils the aesthetics of a home, it can also be harmful to your health. Certain people may be more affected by mould, experiencing respiratory problems, sneezing, rashes or other ailments. Mould can also cause an unpleasant smell in the house.

You may be able to remove a small amount of mould yourself with some high quality cleaning supplies, but for larger jobs you will need the help of a mould removal/remediation specialist.

Depending on the size of the job, it could cost hundreds of dollars to remove, or tens of thousands of dollars. The presence of mould may also indicate other issues, like a plumbing leak, which will also require attention and cost money to fix.

Downlight Safety

Old or poorly installed ceiling downlights with inadequate protection cause at least one house fire every week in Western Australia. Cap-It-All identify this type of defect on a weekly basis.

It is important that downlights are adequately protected from coming into contact with combustible materials, and putting the lives of you and your family at risk. This can be a relatively small job, or a large job depending upon the extent of unprotected downlights and how easy it is to access them. A licensed electrician must undertake this kind of repair, and it is likely to cost hundreds of dollars.

Insect Infestation

Creepy crawlies are the last thing you want to see in your new home. The worst of the pest infestations are termites. Termites’ insatiable appetites will see them chowing down on all the wood in your home, which may result in the structural integrity being compromised. A really bad infestation could render a home completely unlivable.

You will need to hire a pest control specialist to remove an infestation. Termite treatments will usually cost a couple of thousand dollars.

Loosed/Joined Wiring and Incorrect RCDs

It may not be obvious on first glance, but loose/joined electrical wiring and incorrect RCDs can be a serious safety hazard. Faulty, loose or old wiring can pose a risk of electrocution if a person comes into contact with the unsafe wires. Additionally, there should be RCDs (Residual Current Devices) protecting all power and lighting circuits. Once you purchase a home, any faults with the wiring or electrics become your responsibility to fix, and if you want a safe home, fixing faulty wiring is important.

Replacing the electric wiring in your house can be a costly task. It can range anywhere from a couple of thousand dollars to tens of thousands of dollars.

Cover all the Bases with Cap-It-All Building Inspections

A comprehensive Cap-it-all building inspection in Perth provides a report covering all of these common faults, plus many more. Armed with the knowledge of any potential faults, you can calculate repair costs that will be involved and use them to renegotiate on the price of the house, or choose to avoid it altogether. Don’t get stuck with a dud, call us for an inspection today.

Stay Warm (and safe!) This Winter

With winter underway many people will be firing up their gas heaters. A large percentage of these people would not have given any thought to the safety of these appliances, especially gas ventilation requirements.
Although not a major problem in Australia, on average one person is killed and many others seriously injured
every winter by the effects of carbon monoxide released by gas heaters, particularly the flue-less type that are connected using a gas bayonet fitting (quick connect device socket).
The Department of Health in WA has already felt the need to issue a warning following an incident in which a charcoal barbeque was brought indoors resulting in the occupant becoming the first reported sufferer of carbon monoxide poisoning this winter.

The combustion products produced by flue-less gas heaters include a number of pollutants such as nitrogen dioxide and carbon monoxide. Water vapour is also produced which can directly affect health, particularly in those with current respiratory sensitivities, by increasing the growth of moulds and dust mites.
By law, any room where a flue-less gas heater is operated, two permanent ventilation openings must be installed, one at a high level and one at a low level, and both must be connected to a source of air outside the building.
It is of paramount importance that manufacturers’ recommendations are fully understood and strictly adhered to. All gas appliances should be serviced by a licensed gas fitter bi-annually, or annually if they are over ten years old. Flue-less gas space heaters should never be used in a bedroom, bathroom or caravan.

To reap the most benefit from gas space heaters, the following should be undertaken in preparation for winter:

  • Check the service sticker on the appliance; is it due for a service? Always employ a licensed gas fitter or service agent.
  • When using a flue-less heater, ensure the room is adequately ventilated.
  • Make sure that permanent ventilation openings are not blocked.
  • Check flues are not obstructed.
  • Make sure that roof insulation is not obstructing a heater in the roof loft space.
  • Check the outer case of your space heater. Is it discoloured? Discolouration is an indication of a faulty flue and that it is time to have it serviced by a licensed gas fitter.
  • If you have difficulty re-lighting the gas appliance, call a licensed gas fitter or service agent.
  • If the heater’s flame is yellow this may indicate that the appliance is not running correctly and requires servicing.


Carbon monoxide is odourless and colourless, but can cause illness and death. A pro-active approach should be taken with your gas heating appliances to ensure that you and your loved ones do not fall victim to this silent killer.

As part of Cap-It-All Building Inspections’ Pre-Purchase Comprehensive Building Inspection, we will inspect for adequate sources of ventilation for gas bayonets within the home you’re purchasing, and report on any possible hazards to you and your family’s health and safety.

The Real Savings of a Pre-Purchase Building Inspection

If you’re thinking of buying a house, you may be wondering if it’s worth getting a building inspection beforehand. While a property may seem perfect at first glance, there may be hidden defects, ways to save money, health hazards and even safety issues at hand. Here are some of the reasons a building inspection can result in big savings.

Save your Money

The cost of a home might not be the end of your spending if you buy a damaged property. Think about the thousands you’ll drain fixing faulty plumbing, paying for the extermination of a termite infestation or repairing other structural damage. With the insight of a building inspection report, you can, in some situations, renegotiate the cost of the home based on the estimated repair costs, or just walk away and find a better place.

Save your Health

If you intend to purchase an older house, it may contain asbestos, which was used in building construction until around 20 years ago when it was strictly prohibited. If you bypass an inspection for a house containing asbestos and decide to renovate, you may be unknowingly releasing asbestos into the air. If inhaled, it could cause serious health issues. An inspection will identify the presence of any asbestos in the building.

Save your Life

Catch fire risks before moving in by getting an inspection and it could very well save your life.

So before you buy, try Cap-it-all’s Perth home building inspections. A Cap-it-all comprehensive report includes information on smoke detectors and downlight safety in the house. Faulty or old electrics can pose a fire and electric shock hazard in the home.


Building Inspections with Cap-It-All

Cap-It-All’s comprehensive pre-purchase building inspections are easy to book, easy to conduct, and well worth your time. An accurate inspection means savings: it can save you headaches, it can save you money and it can even save your life.

The Telltale Signs of a Termite Infestation

Cap-it-All has many years’ experience scouting out pesky timber pests and identifying termite infestations. We have specialist knowledge and equipment which allows us to provide a comprehensive inspection for termites, and confirm with certainty whether these unwanted visitors have taken refuge in your home.

If you suspect you have termites, an inspection and treatment could save you loads of trouble and expense. But you don’t want to call us over to find out that nothing is wrong, after all. To save you the trouble, we’ve put together a list of signs that you’ve got termites. See these, and it’s time to act before they do serious, noticeable damage to your home.

Frass

If you’ve noticed mysterious little piles on the floor of something that looks like sawdust, you might actually be looking at termite poo! The droppings of drywood termites are tiny pellet piles, also known as frass.

Flying Termites and Wings

Seen any strange winged insects in your home? You might have brushed them off as harmless winged ants, but did you know they could actually be termites? Flying termites often swarm around light sources and they drop their wings after mating – so if you see discarded wings on the floor, you could have some trouble on your hands.

Mud Tunnels

A clear sign of termites are pencil-sized tunnels of mud (pictured at top), which will usually be found around the home’s foundation and may be travelling up the outside walls.

We all know the devastating impacts termites can have on the home, so don’t wait till it’s too late – catch a termite infestation early with an inspection from Cap-it-all.

Termite Inspections with Cap-It-All


Cap-it-All not only reports whether your home has termites, we’ll also tell you what type of termites you’re dealing with, the genus and what kind of structural damage they can potentially cause. We also report the exact areas the termites were found, so your future treatment can be targeted, saving you time and money.

Types of Concrete Cracks – Plastic Shrinkage Cracking

Small or fine cracks identified on a concrete slab are generally deemed acceptable as part of minor settlement, weathering, or poor finishing of its surface. However, a competent building inspector should be able to not only classify the severity of the cracking, but also appropriately investigate the cause of the cracking. The following blog focuses on cracks that form as a result of what is known as plastic shrinkage cracking.

What is plastic shrinkage cracking?
Plastic shrinkage cracks are so-called because they form while the concrete is still plastic, ie has not set. Whilst the member begins to dry it shrinks, and as such cracks may form. These cracks are not always evident immediately after pouring and may be discovered the following day.

Plastic shrinkage cracks may be in a random pattern or may be roughly parallel to each other. Cracks are usually straight, ranging in length from 25mm to 2m but are usually 300 to 600mm long. They rarely appear in areas towards the edge of the slab.

The width of the crack can be up to 3mm wide at the surface and may penetrate right through the concrete member, although generally cracks taper from the surface. Plastic shrinkage cracking should always be monitored as cracks may widen due to subsequent drying shrinkage and thermal movement.

What causes plastic shrinkage cracking?
The general principal around plastic shrinkage cracking is that the rate of evaporation at the surface of the concrete is greater than the amount supplied to it. The concrete surface dries out and shrinks at a time when it is yet to achieve its desired strength, and therefore cracks are evident on the surface. This process can be likened to when cracks appear on the surface of clay soil as it dries.

The rate of evaporation from the surface of a concrete member is dependent upon a number of factors involving both mix design and environmental factors.

How can plastic shrinkage cracking be avoided?
The addition of moisture to the mix may avoid plastic shrinkage cracking, although the extra bleeding characteristics of these mixes may lead to problems such as plastic settlement cracking, and the mix may not comply with the requirements of the slump test.Controlling the rate of drying of the surface of the concrete (evaporation rate) is the key to avoiding plastic shrinkage cracking. The following may be adopted to minimise the incidence of plastic shrinkage cracking:

  • Dampen the subgrade and formwork, ensuring that any excess water is removed prior to placing concrete.
  • In hot weather, lowering the temperature using chilled mixing water or replacing some of this water with crushed ice.
  • Avoid pouring concrete prior to the temperature reaching thirty degrees, and when the forecast temperature exceeds thirty-six degrees, concrete must not be poured.
  • Protect the surface from drying out by the use of wind breaks.
  • Apply aliphatic alcohols over the surface immediately after screeding and while there is plenty of bleed water on the surface; repeat the application in severe conditions. These products reduce the rate of evaporation from the surface. They are not a substitute for curing.
  • Commence curing of concrete promptly after finishing and for the specified period.
  • The use of sufficient proportions of synthetic or steel fibres in concrete can provide improved control of plastic cracking.

How is plastic shrinkage cracking assessed when a building inspection is carried out?

All cracking will be monitored by your Perth building inspector throughout the build process. All cracking should be classified in accordance with AS 2870, and advice should be given accordingly.

Generally if plastic shrinkage cracking is less than 1mm in width, it will not require rectification as plastic shrinkage cracking rarely impairs on the strength of a concrete element. However, should the crack penetrate the full depth of the member water penetration problems may arise, or if the cracking is located in wet areas, future waterproofing techniques may be compromised. As such you should ensure you engage a building inspector who understands these concepts.

Case Study

During inspection of this property (photo at the top of the page) at practical completion we found that multiple plastic shrinkage cracks were evident throughout the slab. Upon consultation with our client we found that the slab was poured on a particularly hot day, and due to the slab depth being slightly increased, normal curing methods did not achieve the desired finish.

What are Lift-off Hinges & Why are They Required?

Lift-off hinges are a type of hinge made up of two parts which allow door removal without the need to open the door. The use of lift-off hinges are the most common building solution used for access into fully enclosed sanitary compartments. This National Construction Code states mandatory requirements where a sanitary compartment is not considered large enough to allow safe removal of an unconscious occupant within a sanitary compartment.

What are the requirements?

The current National Construction Code requirements (2015) for construction of sanitary compartments states the following:

Clause 3.8.3.3 Construction of sanitary compartments

The door to a fully enclosed sanitary compartment must –
(a)     open outwards; or
(b)     slide; or
(c)     be readily removable from the outside of the compartment,

unless there is a clear space of at least 1.2 m, measured in accordance with Figure 3.8.3.3, between the closet pan within the sanitary compartment and the doorway.

6893542_orig

A sanitary compartment is stated as any room or space that contains a closet pan or a urinal. In our experience the majority of WC’s around Perth do not have sufficient clear space around the doorway, and as such the above clause from the NCC should be adhered to.

I ordered a pre-purchase building inspection, will this be noted within my report?

At Cap-It-All building inspections we often hear that pre-purchase building reports should not be based upon compliance of the current building code requirements. Whilst we agree that it should not be expected that every property in Perth will be upgraded to current building code requirements, our duty to warn as inspectors means that we will report on any areas that may compromise occupant’s health. As such we feel it is our responsibility to ensure the safety of our clients to the best of our ability, and therefore the lack of lift-off hinges within a property will be noted whilst conducting a pre-purchase building inspection.

Case Study

We also often find that although lift-off hinges are present within a WC, the fixing carpenter has not allowed for the lifting of the door, creating a safety hazard to potential occupants.

At Cap-It-All Building Inspections all our our inspection reports will clearly state safety hazards within our reports, all of which comply with AS4349.1 Inspection of buildings Part 1: Pre-purchase inspections – Residential buildings.

Yellow Brick Stains – What are They & How do I Remove Them?

Iron oxide staining or ‘acid burning’ to clay masonry is a yellow to brown rust-like stain that can also affect mortar. This blog looks at the most likely causes as well as how to rectify.

What causes iron oxide staining or acid burn?

Generally the main cause of iron oxide staining is the improper process of acid cleaning brickwork. A chemical reaction occurs between the iron oxides in the brick and the hydrochloric acid application. This reaction is particularly common on light coloured bricks, as a more diluted concentration is often recommended when preparing the hydrochloric acid cleaning solution. Other common mistakes made include not adequately wetting the wall down prior to cleaning, and not rinsing the solution after cleaning has been completed. For more information on the correct application of hydrochloric acid to clean bricks, please visit INSERT LINK.

Will iron oxide staining cause structural issues to my home?

Generally the presence of staining to masonry is an aesthetic blemish and will not affect the structural adequacy of the block. In unique circumstances such as the use of particularly porous masonry or a poor composition of mortar mix it is possible that hydrochloric acid can ‘eat away’ at the structural integrity of the material, although severe staining or fretting is usually easily identifiable prior to this becoming a structural issue.

It should also be noted that the identification of iron oxide staining may provide an explanation for other forms of damage, such as the corrosion of aluminium window frames. Aluminium and powder-coated finishes should be protected from exposure to any forms of acid, and good maintenance techniques should be adhered to.

How do I remove iron oxide stains?

The two most common forms of cleaning brickwork are high pressure cleaning and the use of hydrochloric acid. It is important that you can identify the type of staining at your property as both of the aforementioned methods of cleaning will be ineffective at removing iron oxide staining.

Removal techniques for iron oxide staining include:

Phosphoric Acid

  1. The application strength and duration will vary. As a guide, use a mixture of 1 part phosphoric acid to 6 parts water.
  2. Apply by brush or spray to the dry wall and allow to stand until the stain disappears, usually within 30 minutes but it can be up to 24 hours.
  3. More than one application may be required. Mortar containing an iron oxide colouring pigment will be lightened by this treatment.

To maintain a uniform appearance, treat an entire wall or keep the phosphoric acid clear of the mortar.

2293245Oxalic Acid

  1. Use a solution strength of 20 to 40 grams per litre of water, with the water being preferably hot.
  2. The method of application is the same as for the phosphoric acid treatment.
  3. More than one application may be required.
  4. Neutralise the oxalic acid by applying a solution of 15 grams of sodium bicarbonate per litre of water. Do not wash off. For this reason the use of oxalic acid may not be suitable in areas that may become in direct contact with aluminium such as window sills.

Proprietary chemicals may be purchased at home depot stores that are equally effective at removing iron oxide staining. Always ensure that you are purchasing a product specifically for the type of staining that you wish to remove, and carefully follow manufacturers recommendations.

If staining does not disappear after multiple treatments, a poultice technique may need to be applied. In essence this technique is the mixing of a paste that is applied over the affected area and left to dry, before brushing off, cleaning, and neutralising.

Adequate PPE should always be worn & due care should be taken when dealing with chemicals. Ensure that all other surfaces are not exposed to the treatment undertaken, as discolouration may occur.

At Cap-It-All Building Inspections our inspectors are well-versed with the vast spectrum of staining that may occur to masonry, and as such will be able to advise you on the required techniques to rectify these cosmetic issues.

Case Study

The picture at the top of this page depicts iron oxide staining. This was easily identified by the inspector as the staining was most evident at the window reveal (an area where hydrochloric acid cleaning is usually concentrated), & at the top of the external brickwork (an area protected from natural weathering that may have washed off the hydrochloric acid).

What is Chemical Delignification & is it a Structural Problem?

Lignin is an organic natural ‘glue’ that binds the cells which make up the timber component together. Chemical delignification is when the lignin within the timber is destroyed, as the timber gradually weakens and finally collapses when the timber becomes defibrated. This type of timber deterioration is also commonly referred to as ‘hairy timber’ as the fibres within the timber detach once the lignin is broken down.

Where will I find chemical delignification & is it a structural problem?

Chemical delignification is generally a problem associated with timber roof battens when identified within the roof loft space whilst conducting a pre-purchase building inspection. Although chemical delignification has the potential to affect other timbers within the roof loft space, generally due to the sectional size of the roof battens accompanied with their position within the roof loft space, they are the first to suffer the effects of this chemical reaction. If for instance a timber-framed roof had timber battens & a roof tiled covering, it would be fair to assume that a roof collapse would occur prior to any significant delignification occuring to any structural framing members.

Although chemical delignification has been associated to timbers with poor durability properties such as Douglas fir (Oregon), here in Perth we have witnessed firsthand that chemical delignification can occur to reasonably durable timbers such as Jarrah. Generally speaking Jarrah has an above ground durability rating of 15-40 years, therefore making many homes around Perth susceptible to this risk.

Although chemical delignification takes a number of years before collapse occurs, it will be classified as a major defect whilst conducting a pre-purchase building inspection. Furthermore, it is not recommended to walk on any roof cover when chemical delignification is identified, due to the threat of the roof cover collapsing.

It would also be prudent to consider the cause of the chemical delignification, as the cause may have bearing on the future health of occupants.

What causes chemical delignification?

As suggested by the name of this type of timber deterioration, chemical delignification is caused by some form of airborne attack on the timber. Examples of causes include:

  • In areas close to the sea, airborne salts attack the timber. This process may be accelerated for homes with terracotta roof tiles, as any tile fretting will allow further amounts of contaminated moisture into the roof loft space.
  • Areas of high pollution, such as homes in close proximity to industrial areas or main roads, airborne pollutants will cause chemical delignification.
  • Another cause of chemical delignification is the release of gases into the roof loft space. This may include the escape of gases from appliances such as slow combustion stoves or perforations to ducting from flued gas appliances. Hot water systems located within the roof loft space may also accelerate chemical delignification.

Is chemical delignification preventable / curable?

In many instances drastic measures would have to be taken to prevent chemical delignification from occurring, as the proximity of the property plays a huge part in the timber deterioration occurring (i.e. close to ocean, close to industrial area etc.). For ongoing maintenance & reduction of risk from damage occurring due to airborne chemicals, sealing roof battens with products such as pale boiled linseed oil will generally prolong their life.

An important consideration when purchasing a property in Perth is that that AS 4349.1-2010 Inspection of buildings – Timber pest inspections will not cover chemical delignification. It is therefore imperative to have a building inspection clause in your contract if you are concerned about the threat of chemical delignification to the property you are placing an offer on. At Cap-It-All Building Inspections we will always inspect the roof loft space, subject to reasonable access, so you can confidently proceed with the transaction of securing your new home.

Case Study

The chemical delignification identified to these roof battens were at a property located close to a main road. The identification of this major defect saved our client tens of thousands of dollars in repair work.

What is Reasonable Access when Conducting Building Inspections?

When we receive enquiries for conducting pre-purchase building inspections a common question asked is ‘will we inspect the roof loft space?’ The answer is always a resounding yes, as long as reasonable access is available. In fact, any inspector who does not access the roof space when access is available is not abiding by the Australian Standard for pre-purchase building inspections. In this blog we explain the general principles of reasonable access & discuss our processes to ensure that access is achieved throughout your potential home.

So what is reasonable access?

The Australian Standard for pre-purchase building inspections is AS 4349.1 – 2007 Inspection of Buildings Part 1: Pre-purchase inspections – Residential buildings.

The following is applicable from AS 4349.1-2007:

7047741

The above table is fairly self-explanatory when assessing what constitutes ‘reasonable access’, and these dimensions should allow access to the majority of area to homes around Perth.

Are there any further limitations to obtaining reasonable access?

A building inspector must make clear to you any limitations that may arise throughout the course of conducting a building inspection. Common examples of limitations may include thick vegetation, excessive insulation within the roof loft space (we have seen left over batts stacked upon each other), air-con ducting, stored goods / furniture, or narrow boundary clearances.

To ensure that limitations are kept to a minimum, we send out a document to the current owner or relevant party stating our expectations prior to attending the property to conduct the inspection. A few examples of important considerations include:

  • Pets: We recommend that any pets be taken off-site during our inspection. Where this is not possible, we will ask that the occupant ensure pets are kept in a secure area that will not hinder our inspection process.
  • Manhole: This is probably the most important area for the occupant to allow us access to. If access is prohibited we notify the occupant that our client (you) may view this as possible concealment. This may result in further inspections being required, incurring additional costs and delaying the settlement process.
  • Locked Doors: All doors should be unlocked to allow us to fully inspect the premises.
  • Furniture: AS 4349.1 – 2007 forbids an inspector from moving furniture and insists the inspection should be visual only. We make every attempt to ensure furniture is stored neatly and will not affect us conducting our inspection effectively.

In the past we have had instances where the occupant of the property informed us that there wasn’t a manhole in place prior to our arrival. This allowed our client to negotiate with the seller for a new manhole to be installed prior to us conducting the building inspection, which caused no delay in settlement and a satisfactory inspection outcome for our client.

Will access restrictions or limitations be detrimental to the outcomes of the building inspection?

In most of these instances your inspector should be adequately qualified to make a judgement on the overall performance of the building despite the above limitations. For example, a property that we recently inspected had difficult access restrictions from the main area of the roof loft space into the roof loft space within the front garage. However, the inspector had noted upon arrival that the roof tiles appeared undulated and as such it was of the utmost importance that the area be inspected. The inspector managed to manoeuvre a way over the air-con ducting and into the roof loft area over the garage, where the effort put in was vindicated as a major defect existed within the roof loft space.

Unfortunately there are instances where access will not be possible, as we have witnessed some instances where there is no manhole. This is much more likely to be applicable to houses that are split level or have had small renovations where gable walls are left extending into the roof loft space. If we can pre-empt these situations from the office prior to attending the inspection then we will make the necessary enquiries, although at times this may prove difficult. In these instances an invasive inspection must be recommended by your building inspector. This may be achieved by simple methods such as the temporary removal of the roof covering, or may require other means to achieve adequate access.

At Cap-It-All building inspections we believe it is essential that all of your potential home by fully inspected to ensure that you move into a safe house. We will make every effort to make this possible at the first attempt of asking, and if this is not possible, we will clearly state the areas that require further inspection.

All That Glitters is Not Gold

Have you been impressed and amazed by the expert renovation teams that grace our television screens with such regularity? Have you often wondered how they can totally transform a dark, dowdy, inhospitable property into a light, bright, enchanting home on a budget that would normally be barely sufficient to purchase the family car?

This year I was given the opportunity to find some answers when I was employed to conduct an inspection and compile a Pre-Purchase Report on a property in Kelmscott, WA which had been the subject of a renovation show by the “Selling Houses Australia” team approximately one year previously.

With 35 years’ experience in the building industry and many renovations completed for both clients and personally I have always been a tad sceptical of the apparently amazing completions on shoe-string budgets that we are constantly exposed to on our television screens.

Whilst conceding that profiting from renovation is viable, in my experience these profits are quite often a result of market movement, purchasing below market value, professional renovating companies with permanent access to the best planners, organisers, building professionals and tradespeople in the business, or last but not least a “painting over the cracks” approach in which methods are deployed to spruce up a property temporarily in order to secure a short term gain.

So what did I find?

1)    Spraying of kitchen and bathroom tiles and fittings faded, marked and peeling in multiple areas.
2)    Fungal decay in the supporting timbers on an attached pergola that was in turn expanding and causing structural damage to the brickwork.
3)    Fungal decay to an upper storey verandah which required immediate attention to prevent the development of a serious safety hazard.
4)    General marking and flaking of paintwork resulting in moisture penetrating external timbers and re-igniting fungal decay.
5)    Cupboards not painted internally.
6)    Replacement doors fitted prior to the laying of timber laminate flooring resulting in the destruction of the floors by the doors not being correctly trimmed to size and dragging against the floor surfaces.
7)    Structural damage occurring to the external brickwork caused by expanding non-structural steel ties.
8)    Unaddressed drainage issues which were conducive to both foundation instability and termite attack.
9)    Safety compliance issues.

All of these defects had either developed due to the “painting over the cracks” renovation that was undertaken around a year previously, or, had been temporarily disguised, or, were as a direct result of either a determination to make a profit come what may, or an ignorance of sound building practise with regard to health and safety.

All this on a property that did not contain a roof loft space/attic where we normally find the majority of defects/issues/safety hazards on both new and established homes. After compiling the report and discussing the findings in an hour long telephone consultation with our client, it was decided to complete the purchase albeit at a reduced purchase price.

Having watched the programme, the renovation team had repeatedly expressed their concerns over being able to complete the project with both inadequate timelines and funding. This had resulted in the television crew skilfully presenting the finished product in a manner that highlighted accomplishments and concealed their shortcomings.

The property did not sell and was rented for around a year prior to being purchased by our client. With the median price of Perth houses currently around $530,000 it is of paramount importance to consider the implications of “caveat emptor” or “buyer beware”.

In our modern, profit-driven society it is imperative that you engage the services of a professional building inspector to assist you in your transaction. At Cap-It-All Building Inspections Perth we will provide you with the necessary information, documentation and advice to allow you to proceed confidently in what may be the largest purchase you will undertake in your lifetime, after all, all that glitters is not gold….